

Photo by Sai Kiran Anagani on Unsplash
How to install Linux on Windows 11
Install Linux on Windows 11 with WSL(Windows Subsystem for Linux)


Windows Subsystem for Linux (WSL) is one such application to boot multiple operating systems in parallel on the Windows platform. WSL lets you install and run your preferred Linux distribution (Which is available in the Microsoft Store) on your Windows computer like an application.
In this post, we will show you practical procedures such as how to install, enable, set up and configure Windows Subsystem for Linux on Windows computers.
What is the Windows Subsystem for Linux?
Windows Subsystem for Linux (WSL) is a compatibility layer for running Linux binary executables (in ELF format) natively on Windows 10. WSL provides a Linux-compatible kernel interface developed by Microsoft, allowing users to run native Linux apps in unmodified Linux distributions running on the Windows kernel. This is made possible through a new Linux-compatible subsystem that was added to the Windows Kernel called Windows Subsystem for Linux (WSL).
WSL offers a simpler installation process for several popular Linux distributions such as Ubuntu, Debian, and Kali Linux. Microsoft is working with Canonical, the company behind Ubuntu, to bring the entire userland to Windows as separate application packages. This makes it possible to run Ubuntu on Windows without having to dual-boot or use a virtual machine.
Requirement
You must be running Windows 10 version 2004 and higher (Build 19041 and higher) or Windows 11 to use the commands below. If you are on earlier versions please see the manual install page.
Please see WSL official installation tutorial by Microsoft for details.
You can check your Windows version by going to Settings App or using a keyboard shortcut 🪟 + I, then go to System > About > Windows specifications.
Install WSL2 on Windows 11
Open Terminal/Command Prompt
For installation
Click Start Menu or use a keyboard shortcut
🪟+R.then type
cmd.for the shortcut, click OK.
for the start menu, right-click the logo Command Prompt > Run as administrator.
Install WSL
After the command prompt opens, type the command below then enter to execute:
wsl --install
The command above will install VM and WSL and install Ubuntu OS in it.
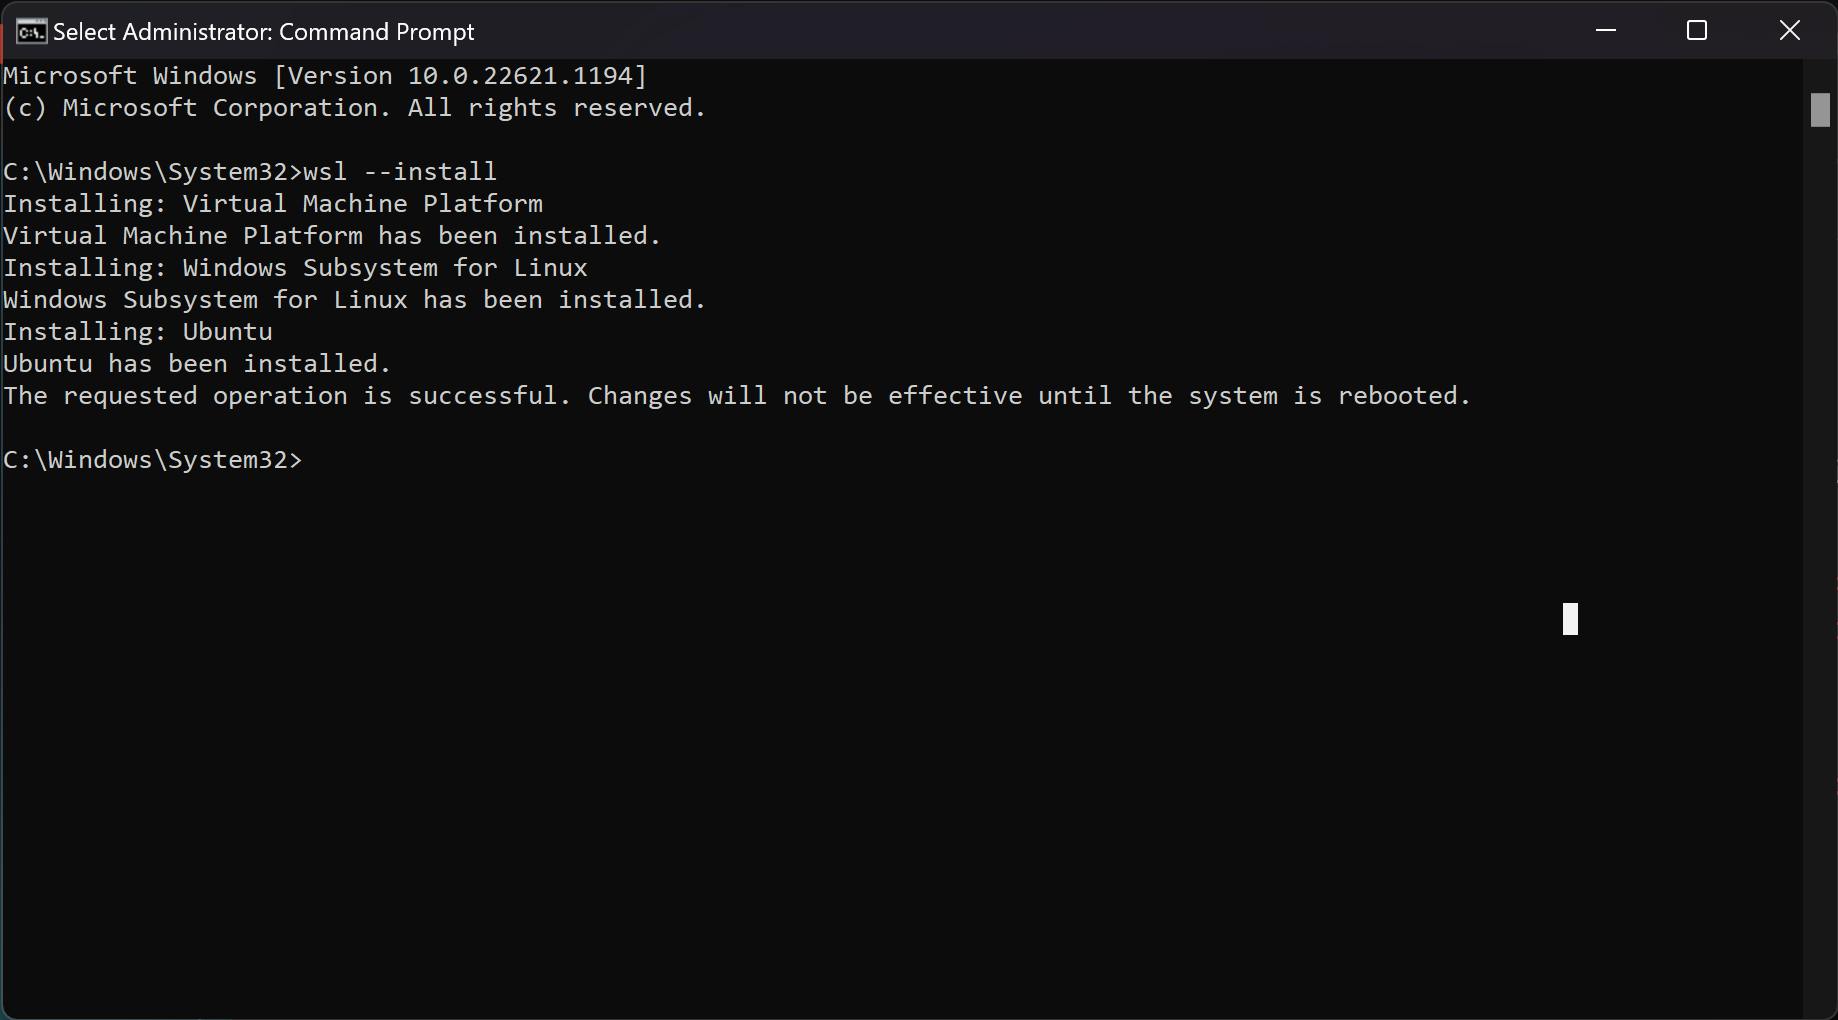
After successful installation, reboot your computer to apply the changes.
After reboot, Open your Terminal/Command Prompt and set up your Linux username & password.

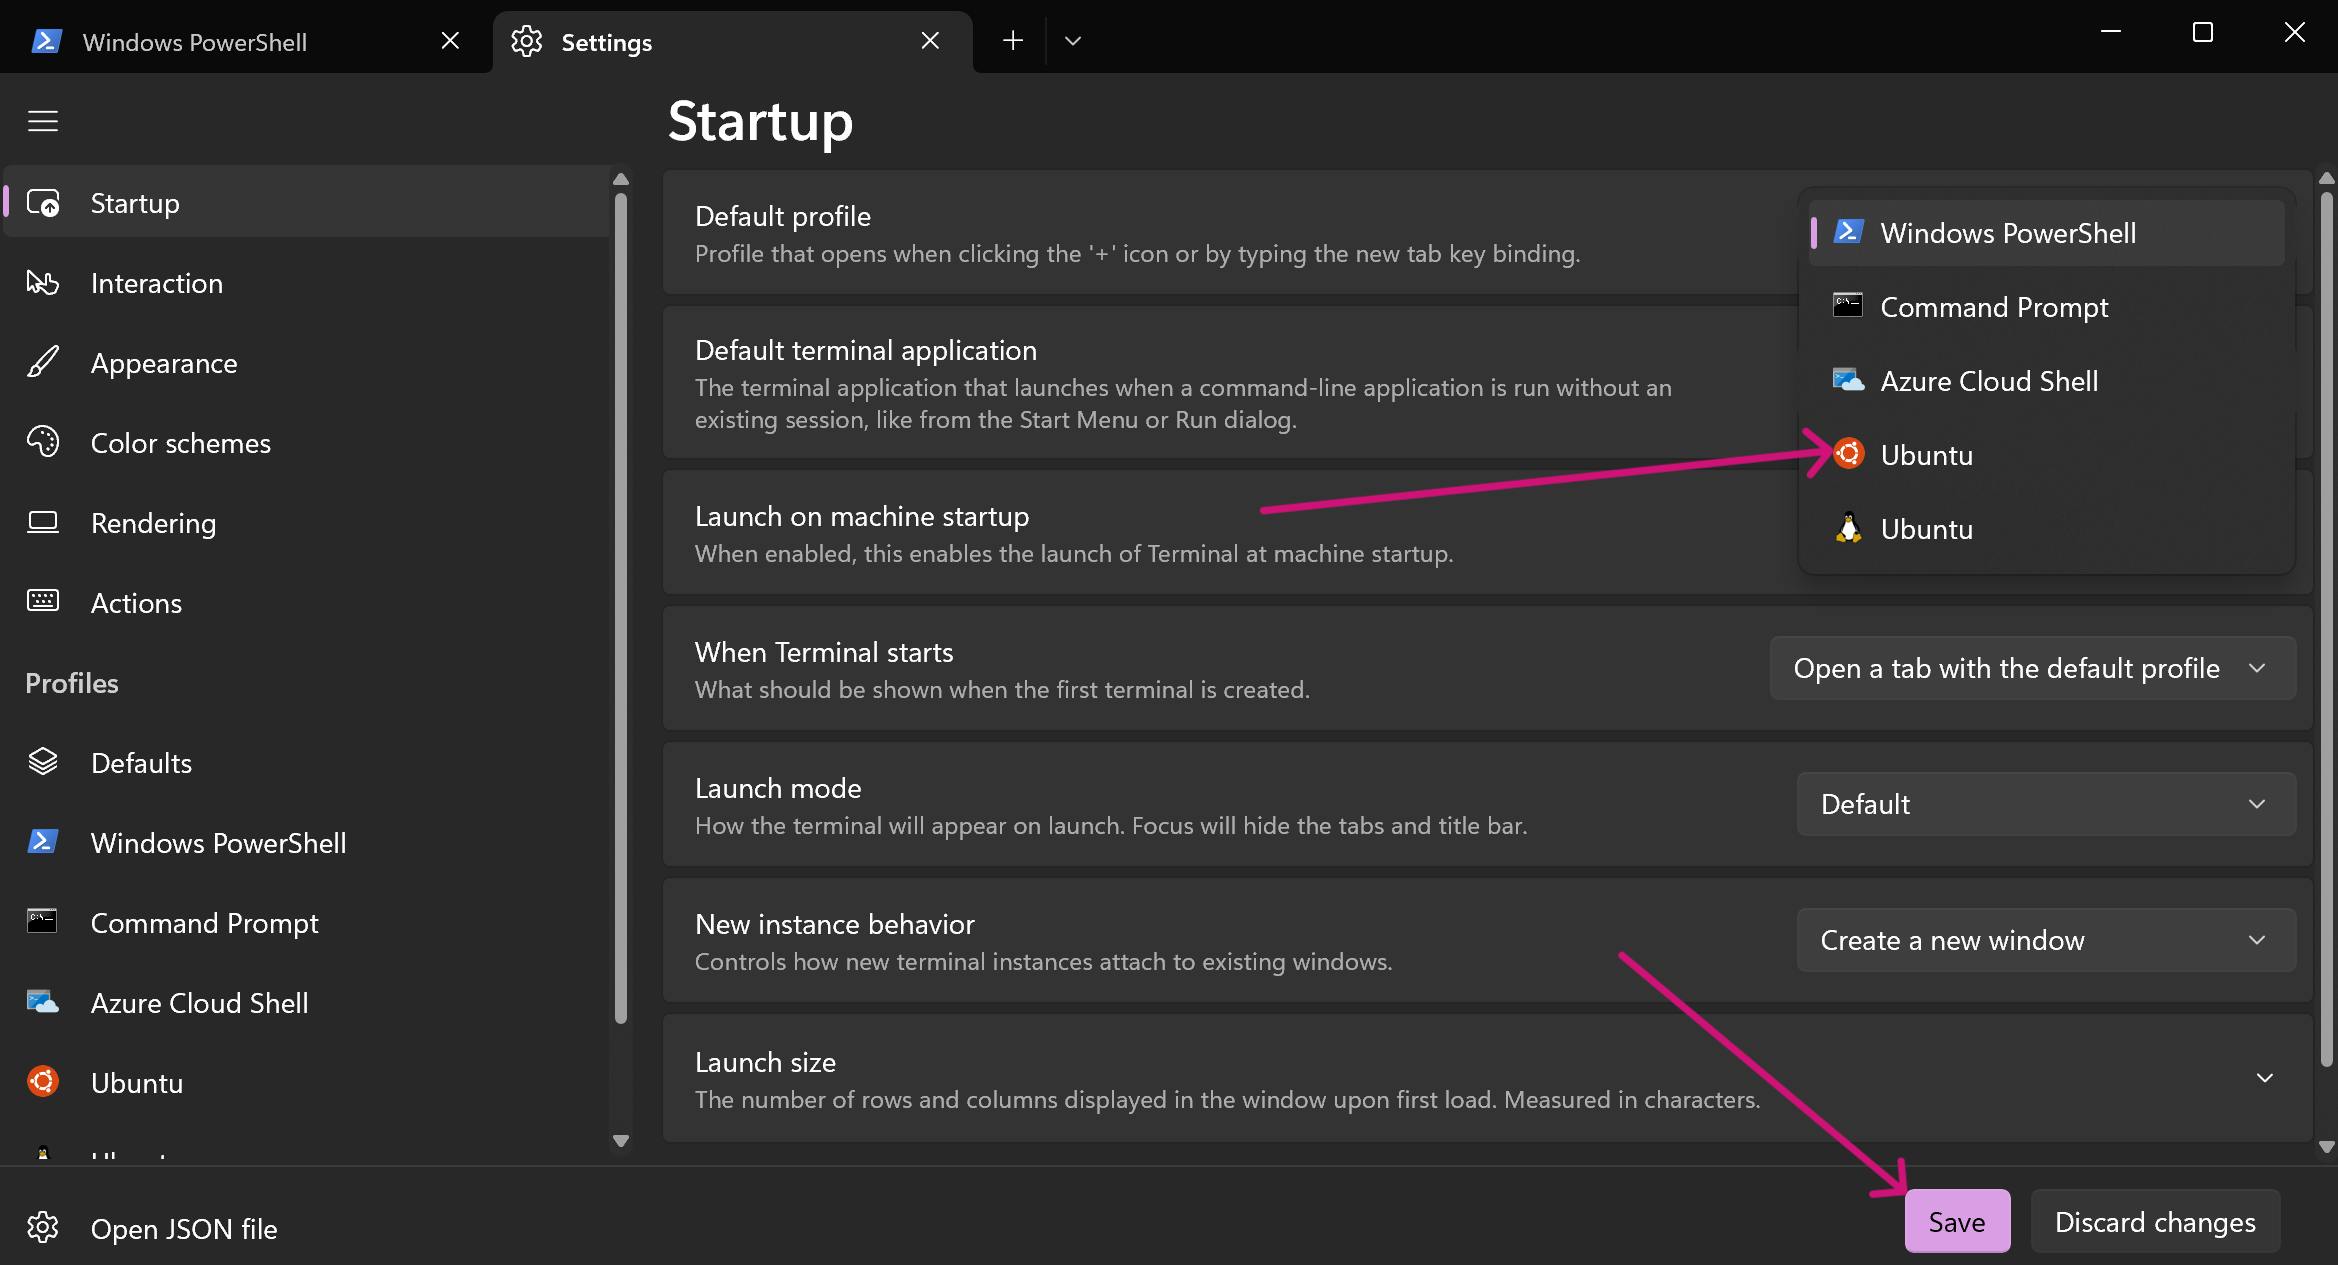
Set Ubuntu as a default
Open your Terminal/Command Prompt
Escape and go to Settings, or with a shortcut
Ctrl+,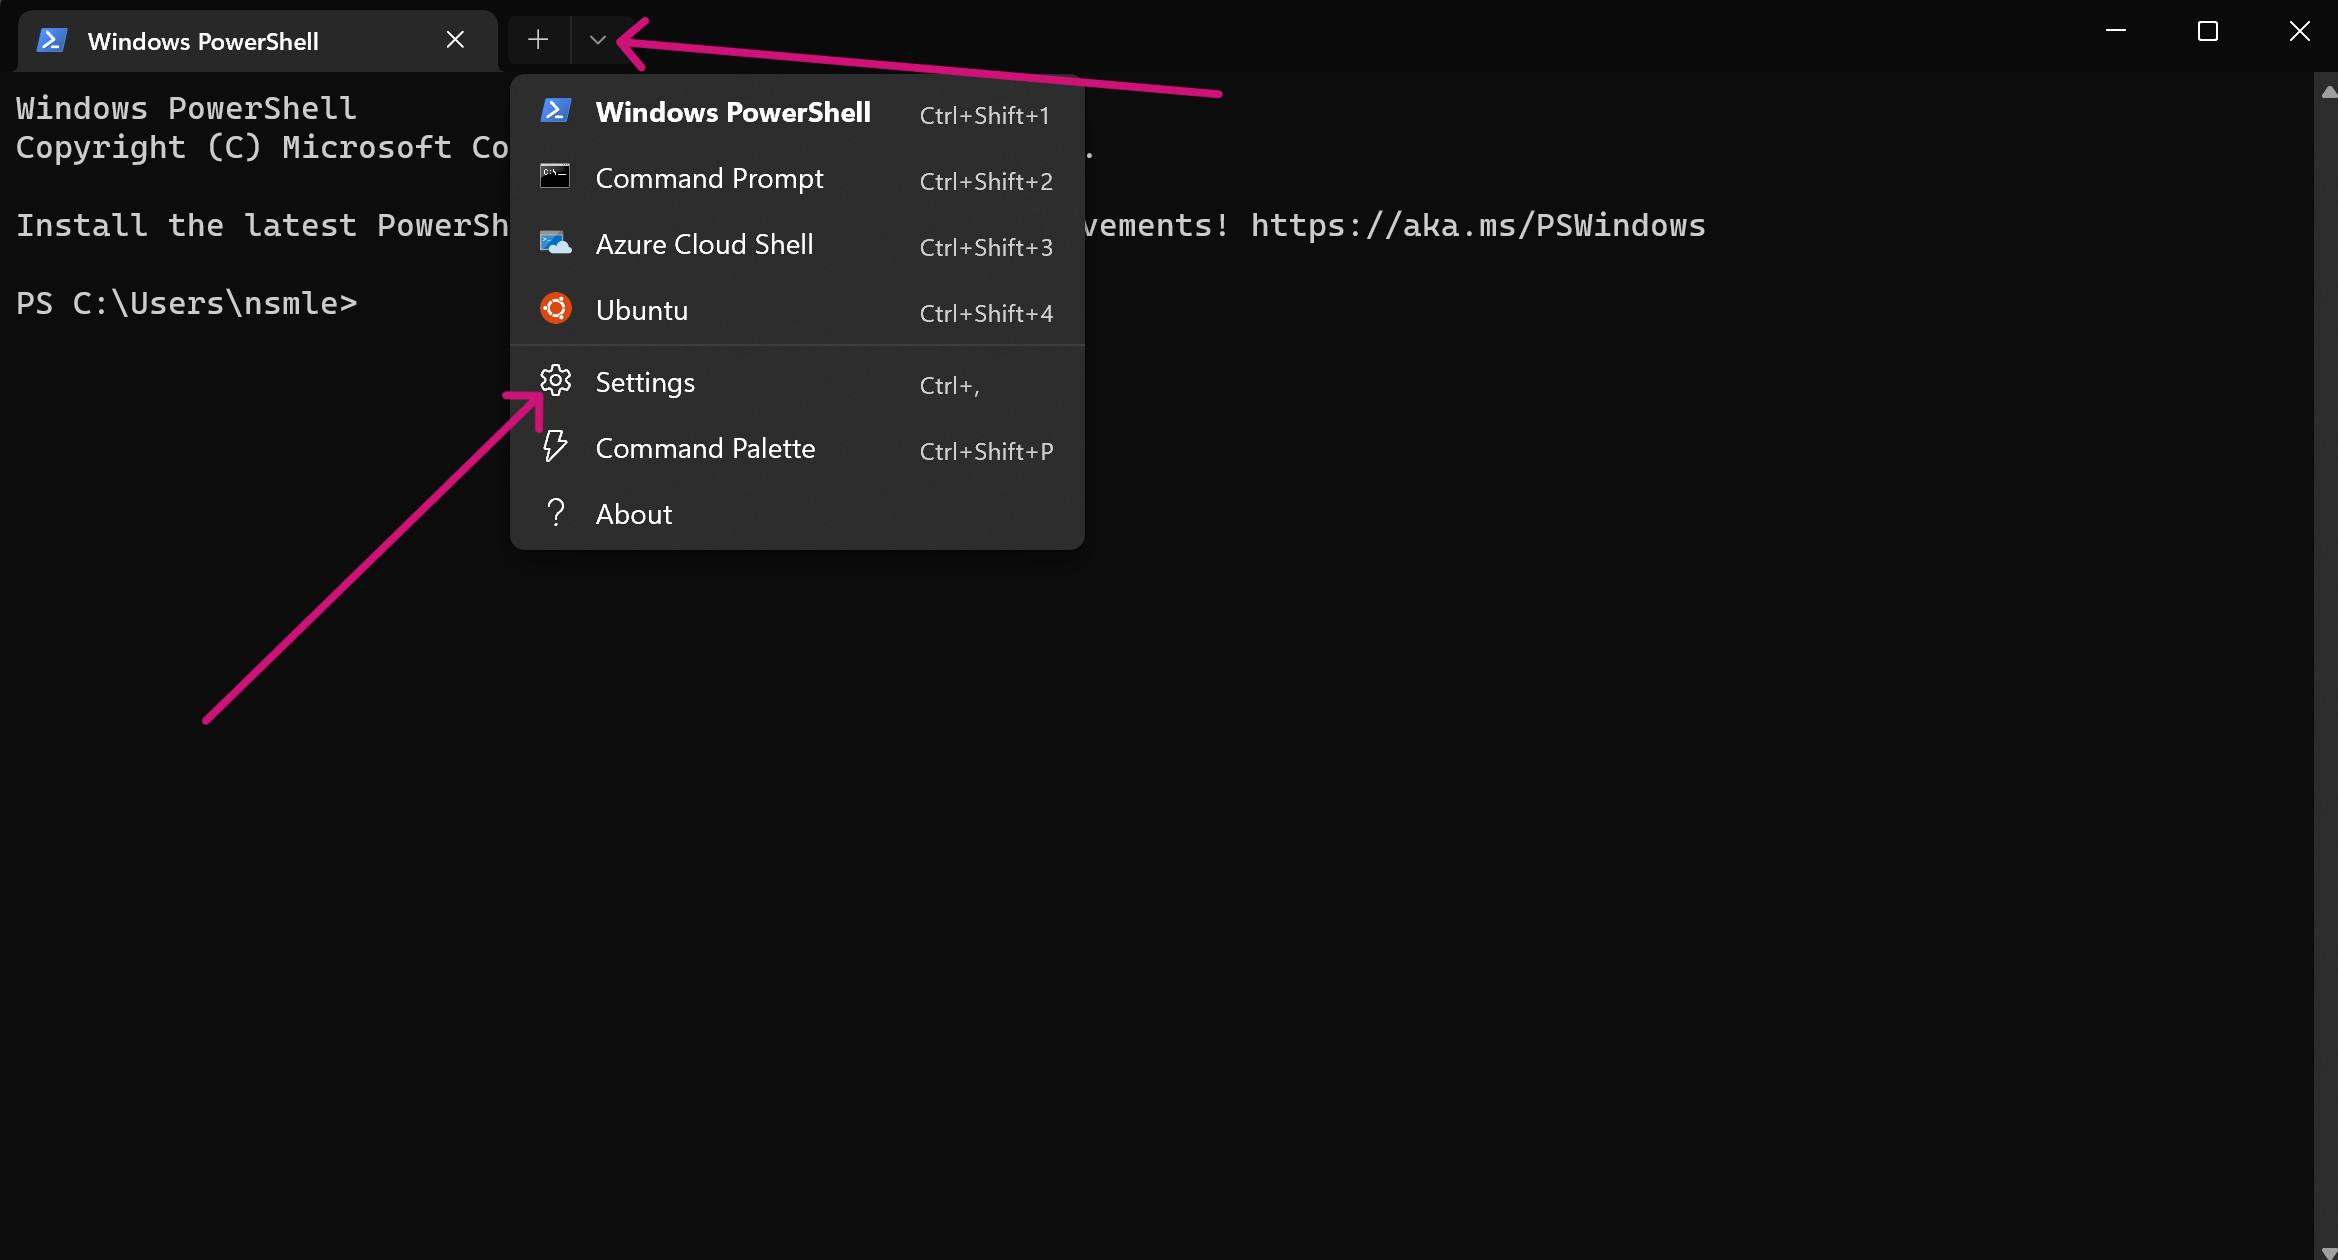
After that, then click Default Profile
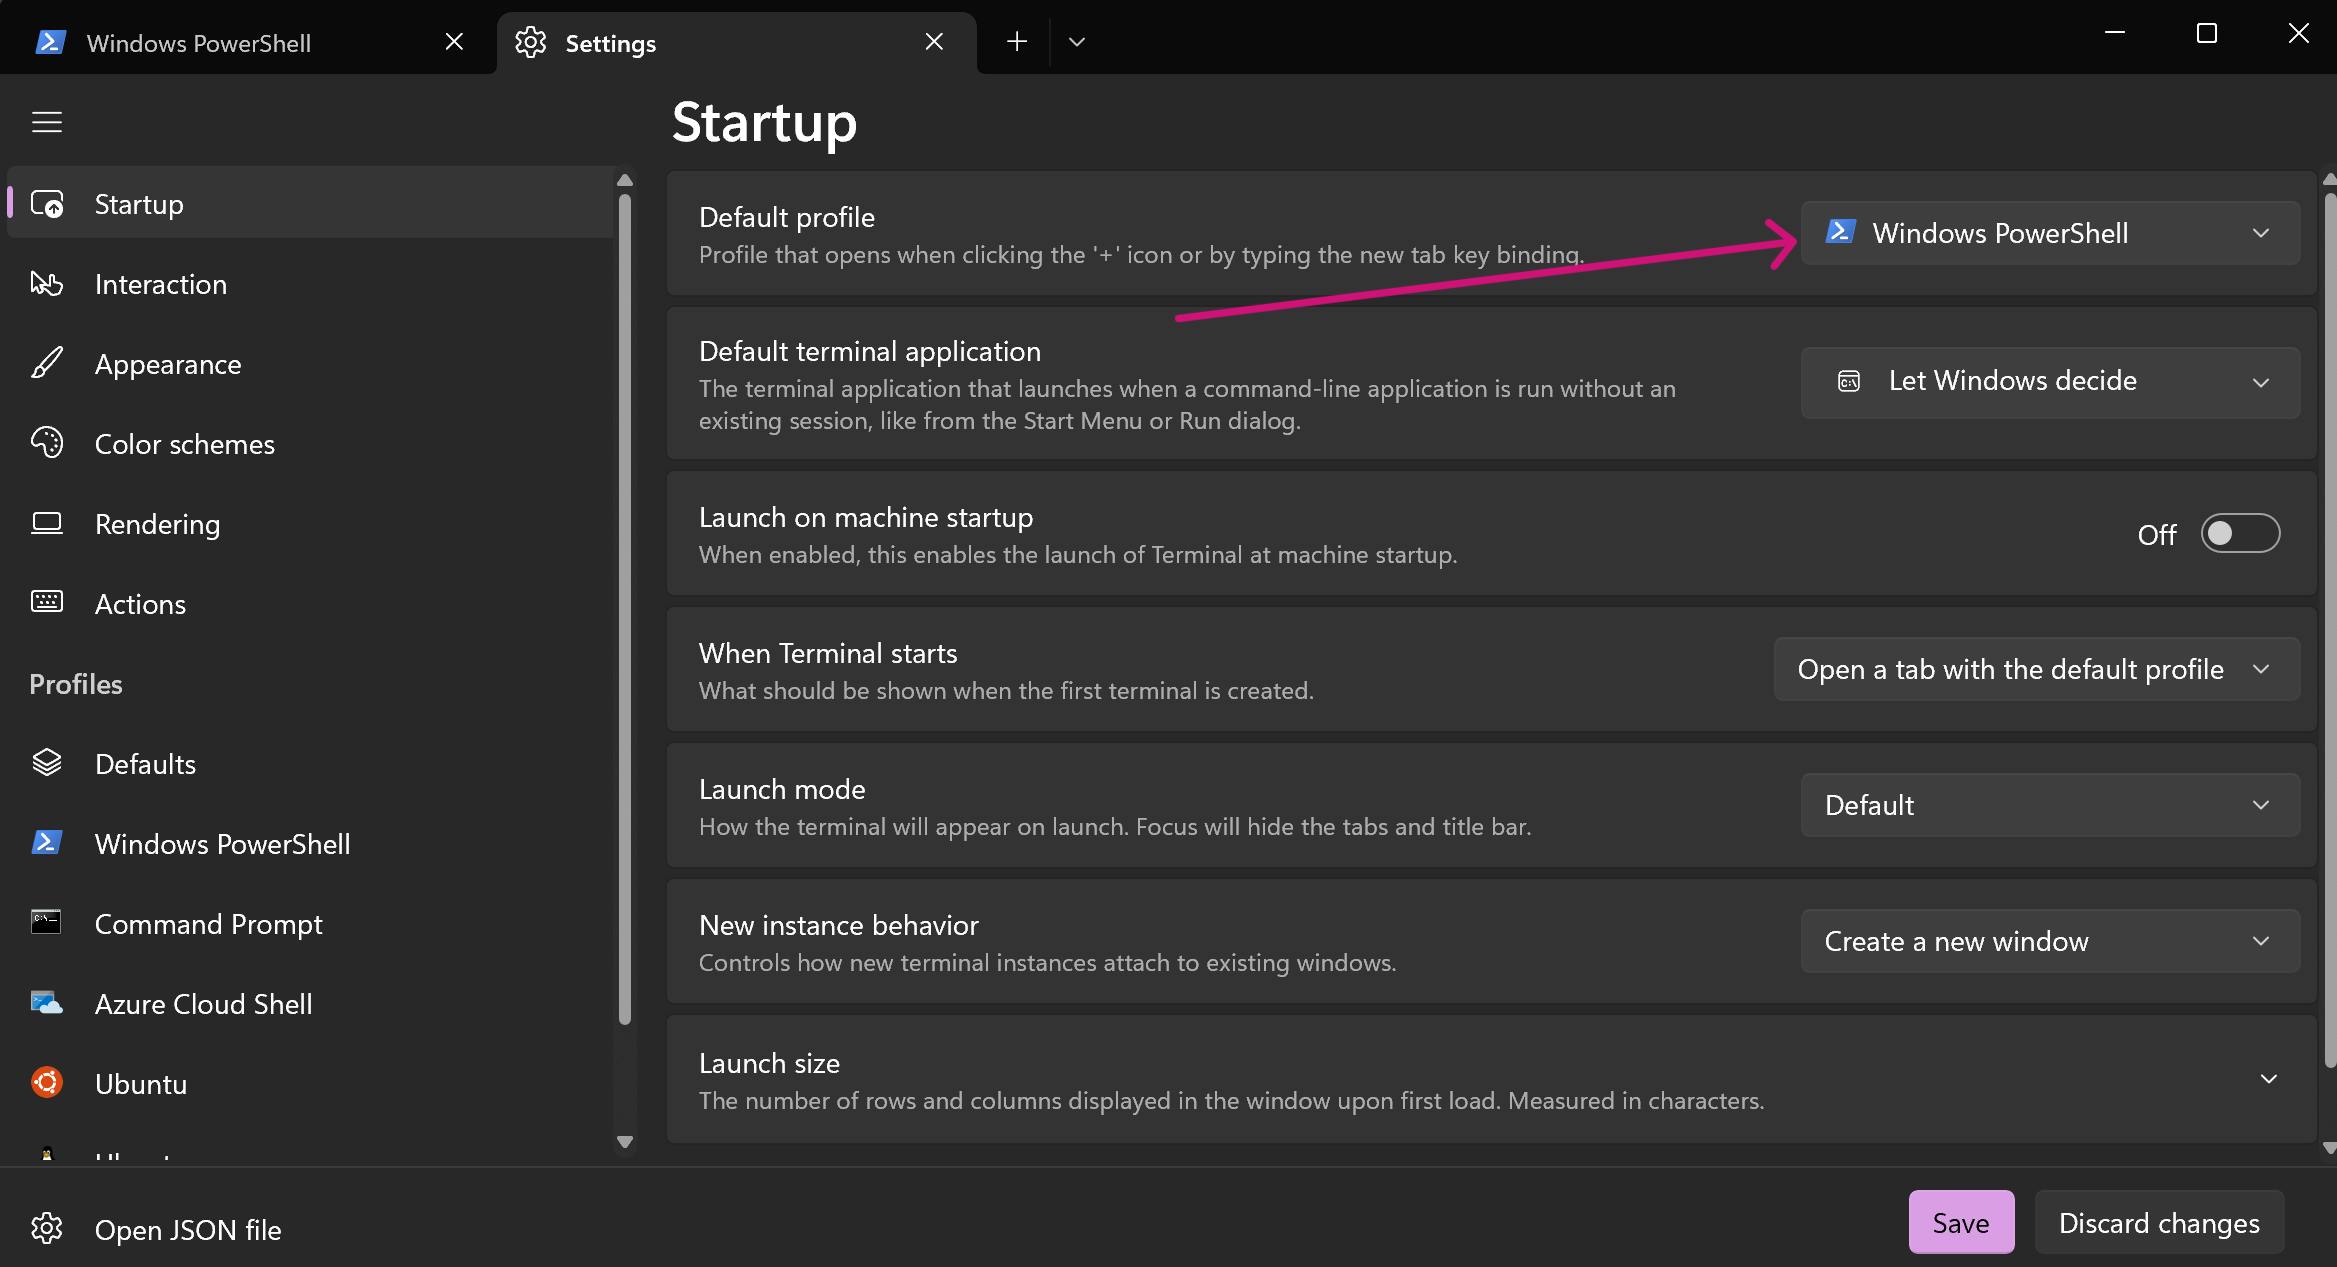
and, set Default Profile as Ubuntu and click Save
Modify & Beauty your terminal
Custom color scheme & Font
In this article, we use a BIM color scheme and use Hack Font. Download and install this font if your computer does not have Hack Font.
Open JSON Terminal Settings
And add/replace like below on profiles and schemes:
{
    "copyOnSelect": true,
    "profiles": {
        "defaults": {
            "colorScheme": "BIM",
            "font": {
                "face": "Hack",
                "size": 11
            },
            "opacity": 40,
            "useAcrylic": true,
            "cursorShape": "bar"
        }
    },
    "schemes": [
        {
            "background": "#18214B",
            "black": "#2C2423",
            "blue": "#5EA2EC",
            "brightBlack": "#918988",
            "brightBlue": "#81B3EC",
            "brightCyan": "#81EEB2",
            "brightGreen": "#BBEE78",
            "brightPurple": "#BB79EC",
            "brightRed": "#F579B2",
            "brightWhite": "#F5EEEC",
            "brightYellow": "#F5B378",
            "cursorColor": "#A9BED8",
            "cyan": "#5EEEA0",
            "foreground": "#A9BED8",
            "green": "#A9EE55",
            "name": "BIM",
            "purple": "#A957EC",
            "red": "#F557A0",
            "selectionBackground": "#E962FF",
            "white": "#918988",
            "yellow": "#F5A255"
        }
    ]
}
Install ZSH
Please see official installation guide
Update the system
sudo apt-get update && sudo apt-get upgrade -y
Install zsh
To install zsh, you can run this command:
sudo apt-get install zsh -y
To set zsh as your default shell, run this command:
chsh -s zsh
or skip the above command for now & install oh-my-zsh
Install Oh-My-Zsh
Install oh-my-zsh
If Git is not installed on your ubuntu, follow the command below:
sudo apt-get install gitSkip this command if Git is installed
Optional: Backup original .zshrc file
cp ~/.zshrc ~/.zshrc.orig
For Install oh-my-zsh, follow the command below:
git clone https://github.com/ohmyzsh/ohmyzsh.git ~/.oh-my-zsh &&
cp ~/.oh-my-zsh/templates/zshrc.zsh-template ~/.zshrc
Set oh-my-zsh as a default shell
chsh -s $(which zsh)
Custom theme
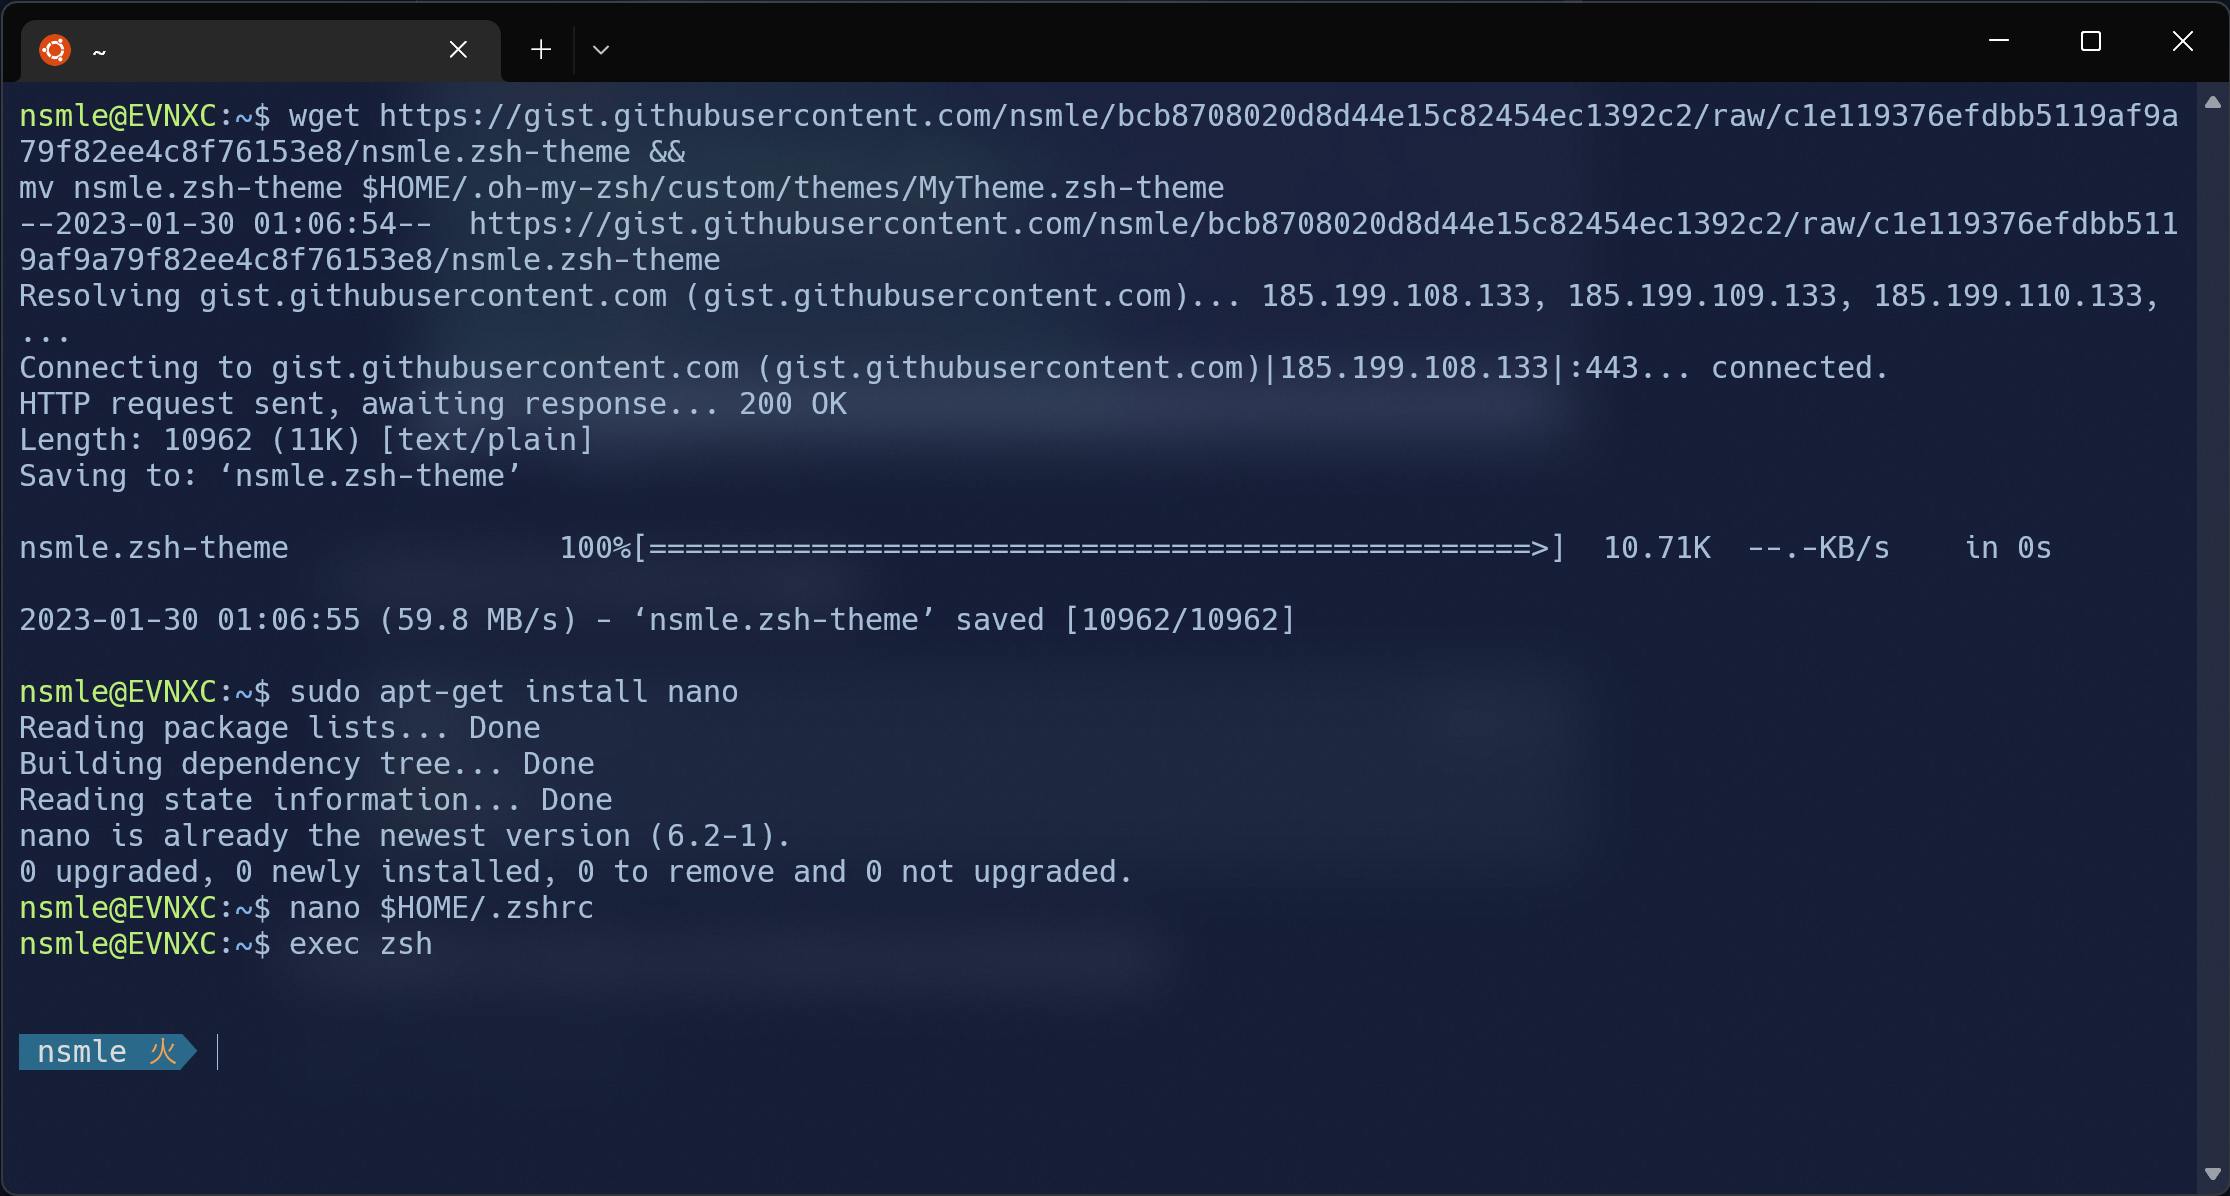
- Download My Theme
wget https://gist.githubusercontent.com/nsmle/bcb8708020d8d44e15c82454ec1392c2/raw/c1e119376efdbb5119af9a79f82ee4c8f76153e8/nsmle.zsh-theme &&
mv nsmle.zsh-theme $HOME/.oh-my-zsh/custom/themes/MyTheme.zsh-theme
Replace theme on
~/.zshrcEdit
~/.zshrcfile with NanoIf nano is not installed, follow the command below:
sudo apt-get install nano
Edit file with Nano
nano $HOME/.zshrcReplace content
ZSH_THEMEwithMyTheme, Default:ZSH_THEME="robbyrussell"Replace with :
ZSH_THEME="MyTheme"Type
Ctrl+Xthen typeyandEnterfor save file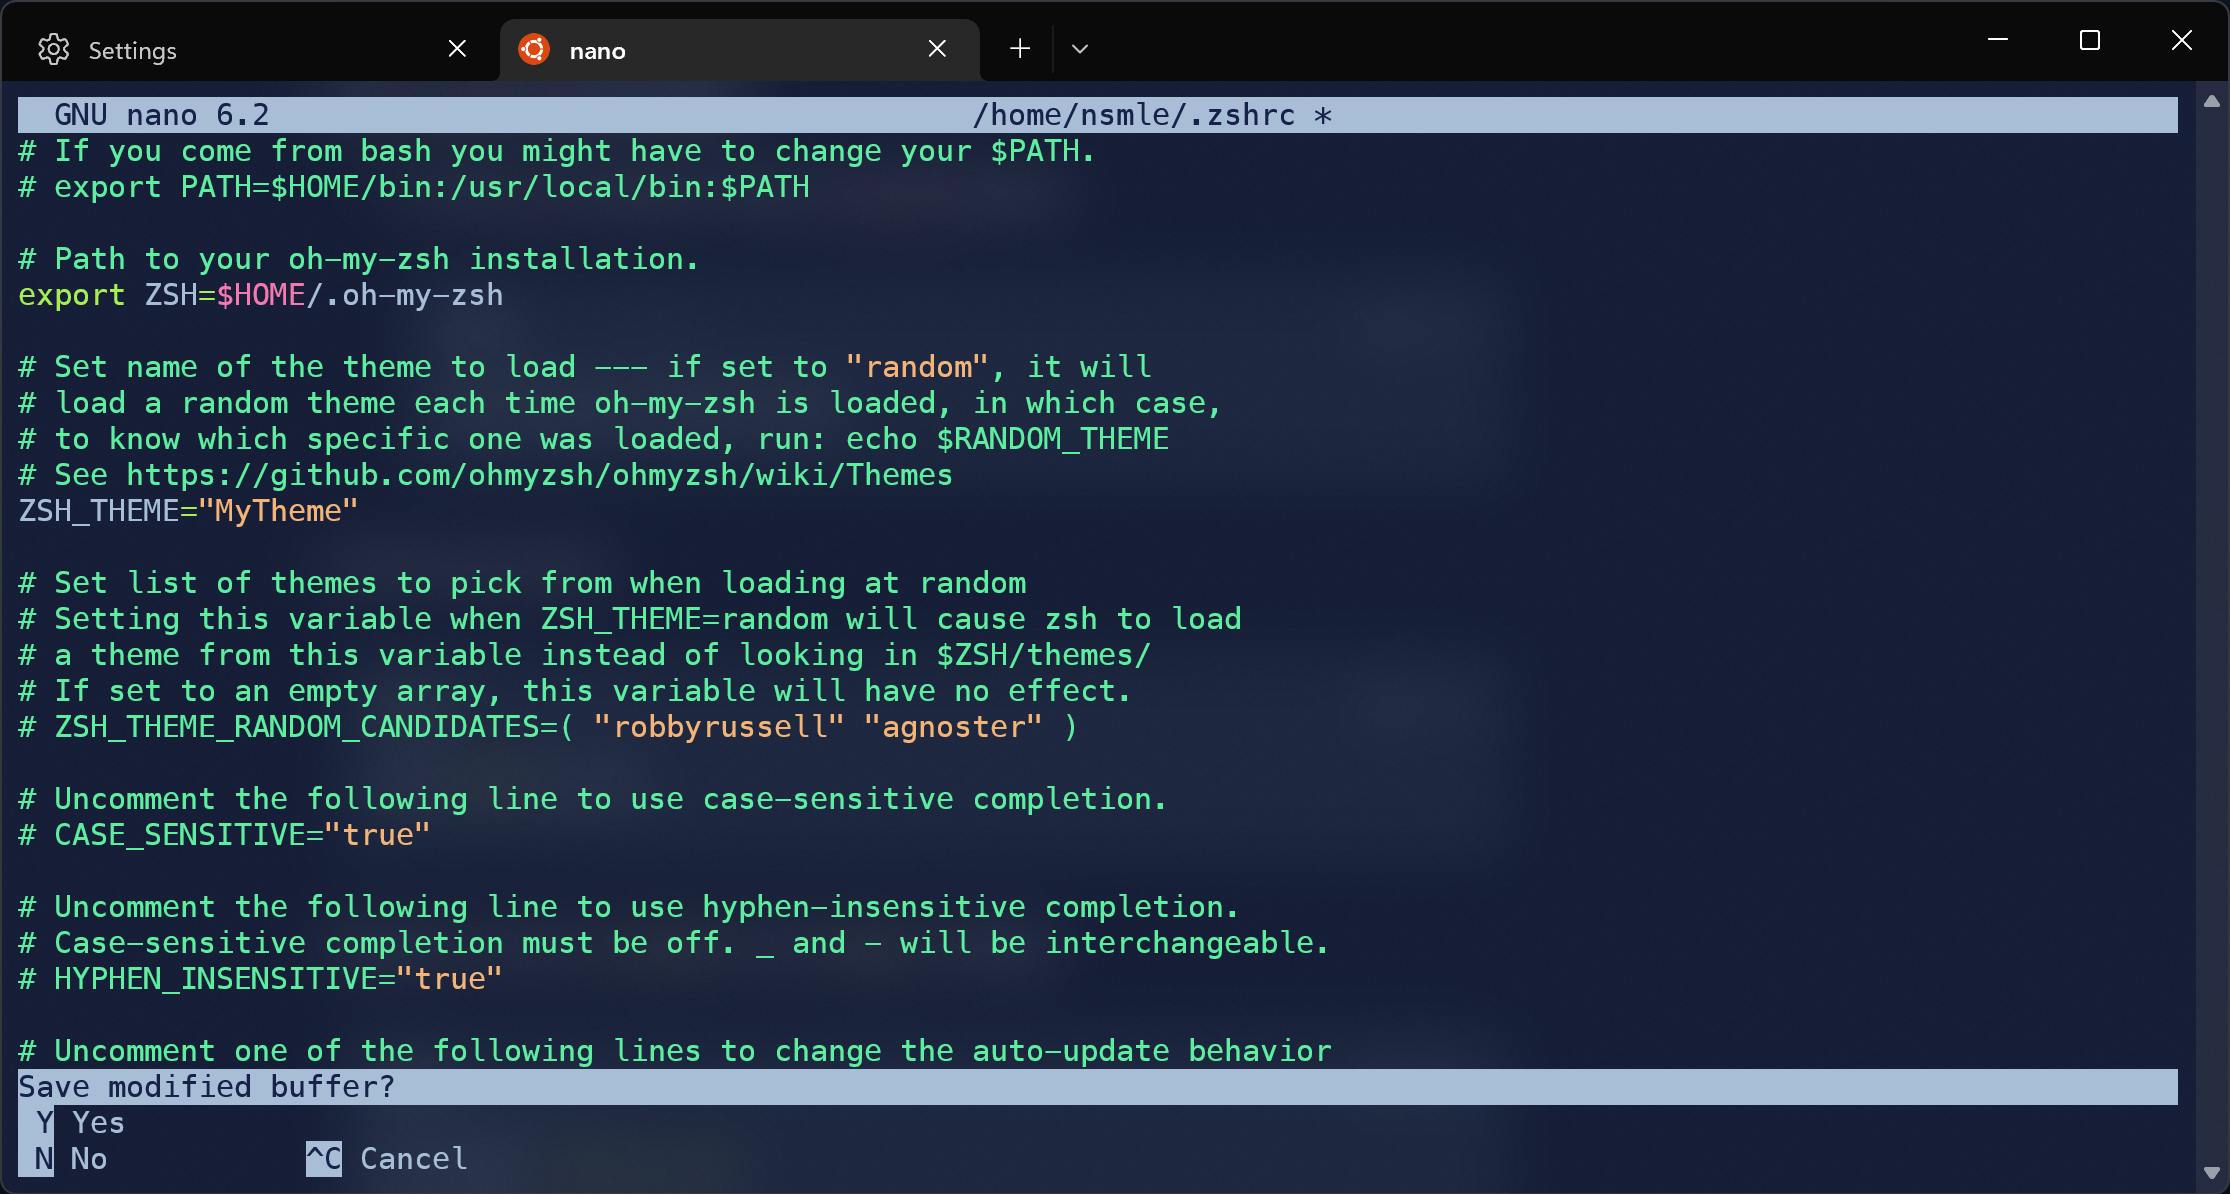
Execute zsh to show the changes
exec zsh
If installation is success, your terminal view will like bellow